Last week, I wrote about my presentation at the Sitecore Symposium. This week I will continue the story, where we left off. Let's continue with challenge number 2.
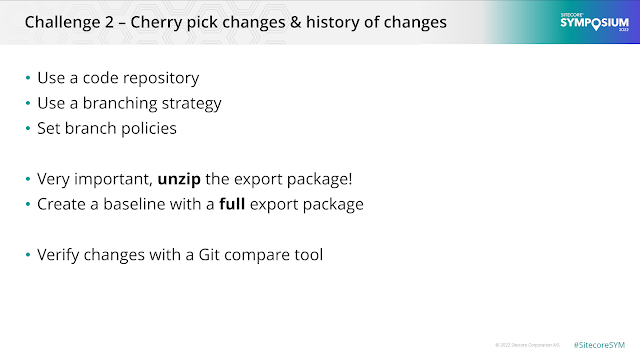
One of the biggest challenges is perhaps also solved the easiest. Like writing regular code, you also want to have your configuration in a code repository. Within Macaw we only use Git repositories nowadays. The biggest advantage of Git is its branching. You can easily create branches and they are easy to merge when you're done. And next to that, there is a lot of good documentation and tooling out there. Personally, I really like to use Gitkraken. It's a really powerful tool with a clean UI to help me work with Git.- Require a minimum number of reviewers
- Limit merge types
- Check for comment resolution
- Check for linked work items
Now that we have a proper repository, how can we store our Content Hub configuration? Well the most important thing to do, is to unzip the export package. Otherwise, you would just be comparing binary code, and we humans aren't used to that. When you unzip the export package, you'll see that it's nothing more than directories with JSON files in them. With that, you can easily compare the JSON files.
Remark: make sure that the first check-in of configuration files is a full export package. That way, you have all the files and can easily spot changes later on.
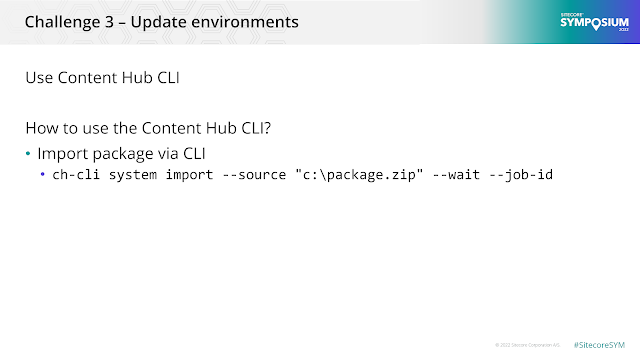
Let's move to Challenge 3 - Update environments. How can we update our environments easily? This is a tool we've seen last week, it's via the Content Hub CLI. With this tool, you can not only export a configuration but also import an export package.
ch-cli system import --source "c:\package.zip" --wait --job-id
--source, this should be the full location of the ZIP file.
--wait, waits for the completion of the task
--order-id, returns the order ID
With the order ID, you can query the Content Hub for the status of the import process. However, keep in mind that the process of the import can be successfully completed, but one of the inner jobs might have failed. Therefore always drill down one level deeper into this. To ensure that the import process indeed all have been completed successfully and not only the main process.
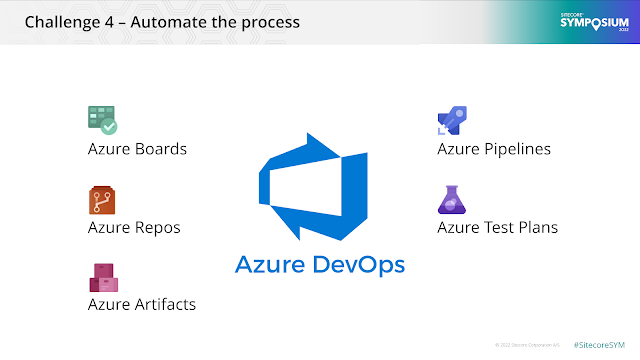
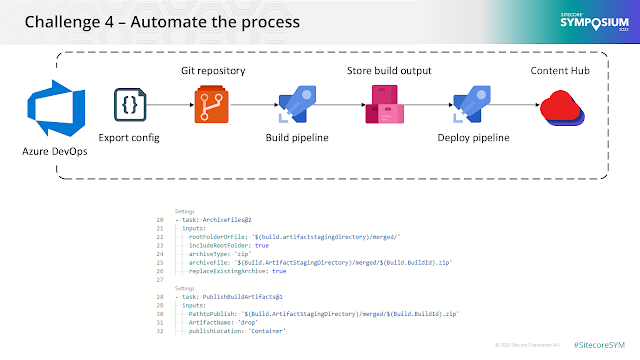
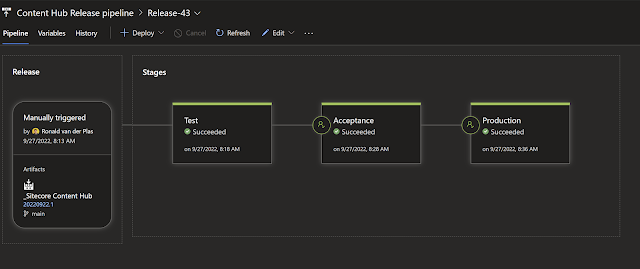
We now have the individual parts solved, but how are they going to be put together? It's now time for Challenge 4 - Automate the process. Within Macaw, we love to use Azure DevOps. It's a SaaS platform that helps us plan, collaborate, develop and release solutions for our customers.
If you look at Azure DevOps it consists of the following modules:- Azure Boards
Deliver value to your users faster using proven agile tools to plan, track, and discuss work across your teams. - Azure Pipelines
Build, test, and deploy with CI/CD that works with any language, platform, and cloud. Connect to GitHub or any other Git provider and deploy continuously. - Azure Repos
Get unlimited, cloud-hosted private Git repos and collaborate to build better code with pull requests and advanced file management. - Azure Test Plans
Test and ship with confidence using manual and exploratory testing tools - Azure Artifacts
Create, host, and share packages with your team, and add artifacts to your CI/CD pipelines with a single click.
I hope this way of working has inspired you to do more automation. If you need any help, please reach out to me on Slack in the #content-hub channel.
For the animated version of the video, check the video below. I've also uploaded the presentation to my Github repo.
Until next time!

